- Access the https://enablegst.bdo.in URL. BDO EnableGST Home page will be displayed.
- Login to the EnableGST Portal with valid credentials i.e. your user Id and password
- User will have to upload Inward data from “upload” tab. Once inward data are successfully uploaded into portal, user can fetch GSTR2B from GSTN by following the below mentioned steps.

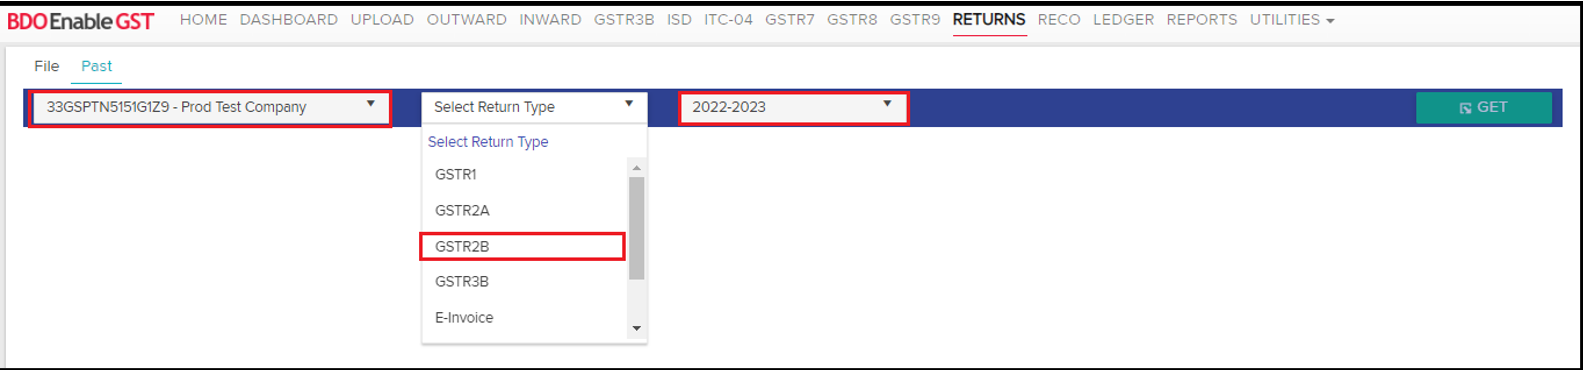
- Click on Returns Tab >> Past

- Select Tradename, Return Type & Financial Period
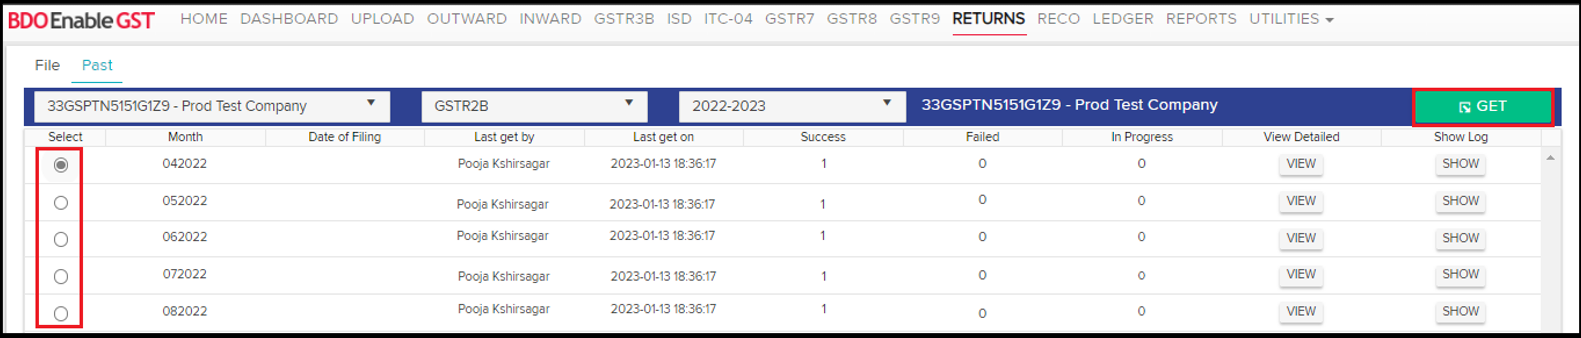
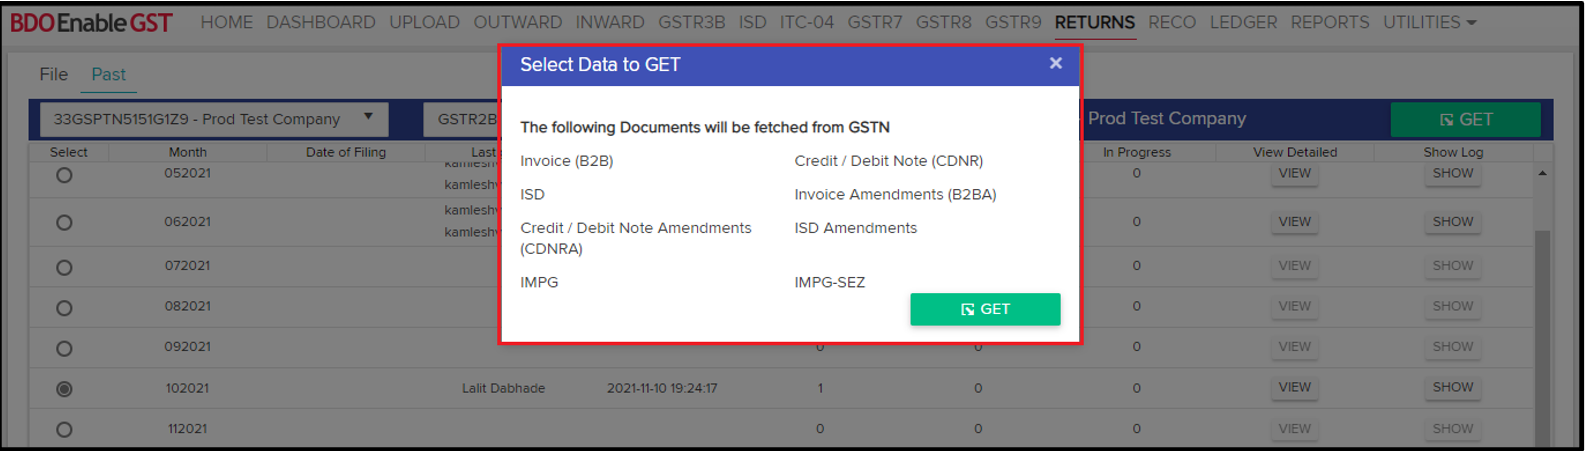
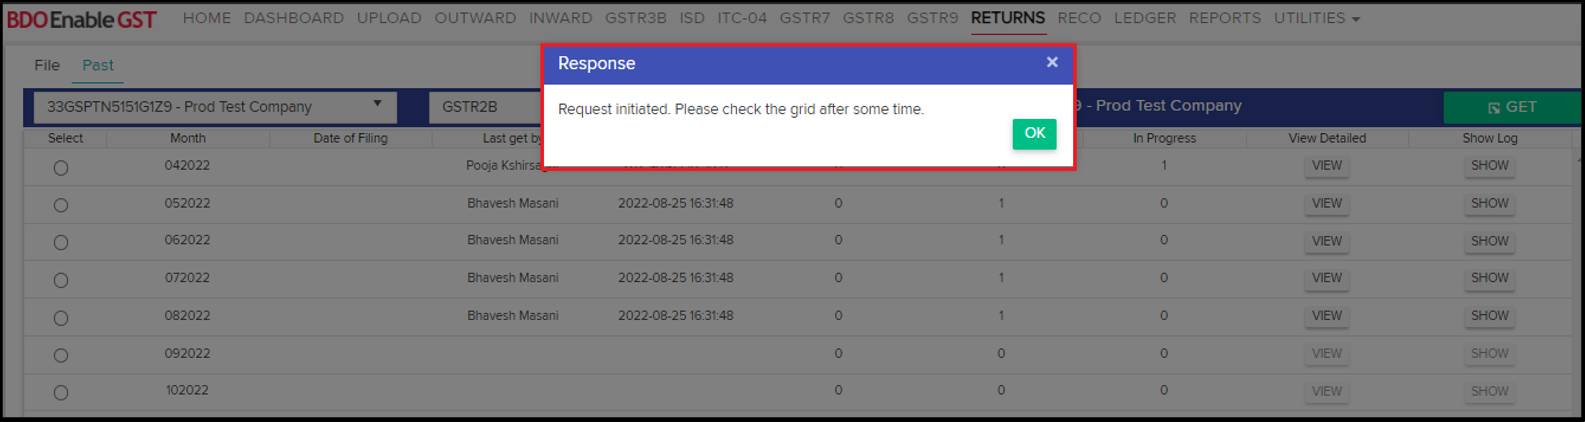
- After selecting the respective month, the “GET” feature will be enabled. Click on “GET” button, user shall get a pop-up mentioning “Select Data To GET”. Click on the respective check boxes & then click on GET button.
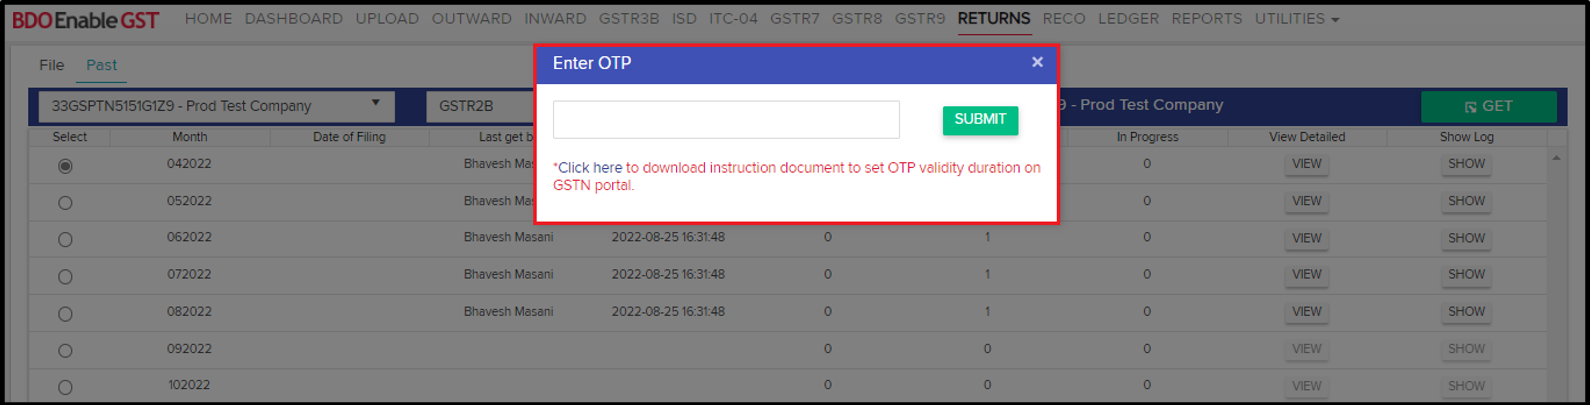
- Once user clicks on “GET”, system shall ask for OTP to proceed further. Kindly make a note, the OTP shall be delivered to the email id & mobile no. which has been registered with GSTN portal.
After submitting, a pop-up will be displayed stating “Request initiated. Please check the grid after some time.”
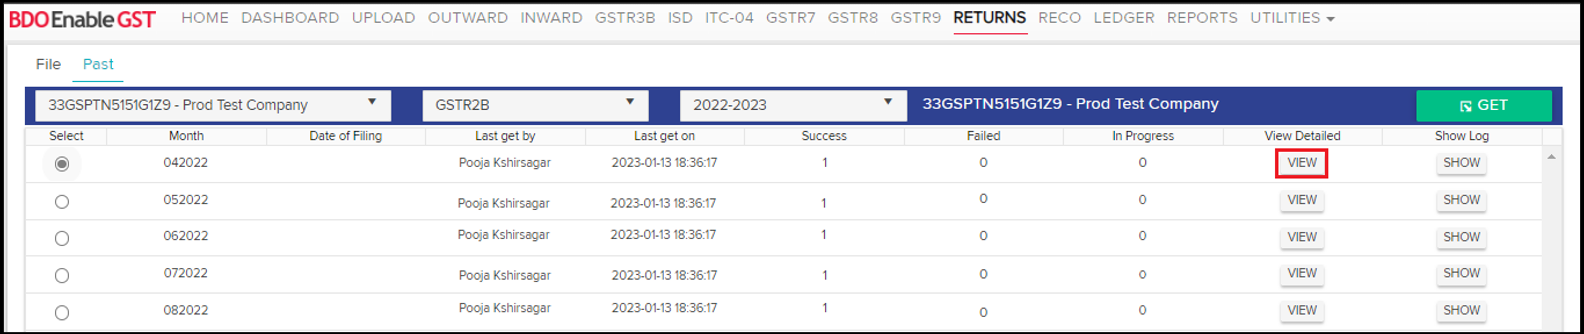
- Data fetched from GSTN can be viewed & downloaded in the detailed format.
- View Detailed Data: Line level data can be viewed & downloaded in excel format by clicking on “View” button under “View Detailed” section.
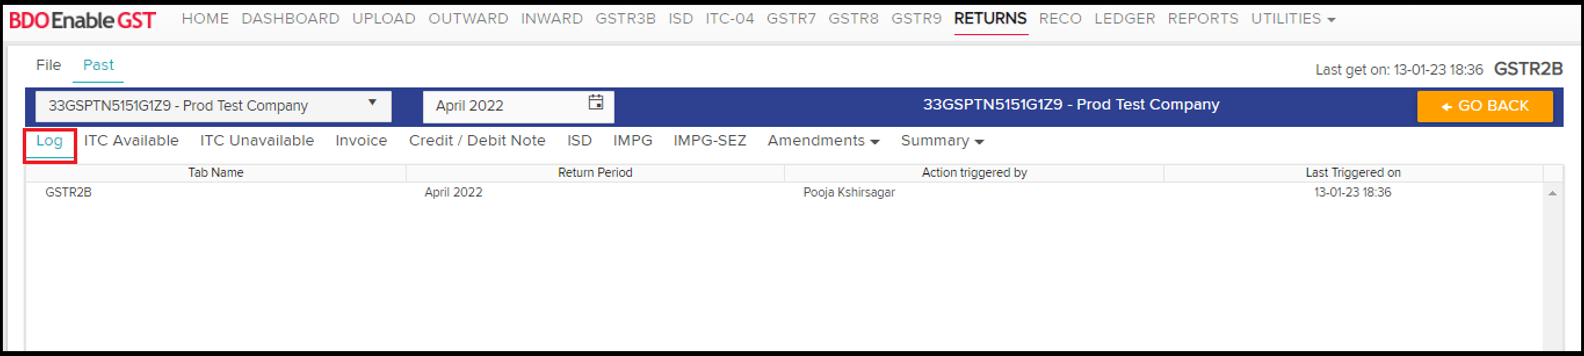
Once user click on “View” following page will displayed.- Log
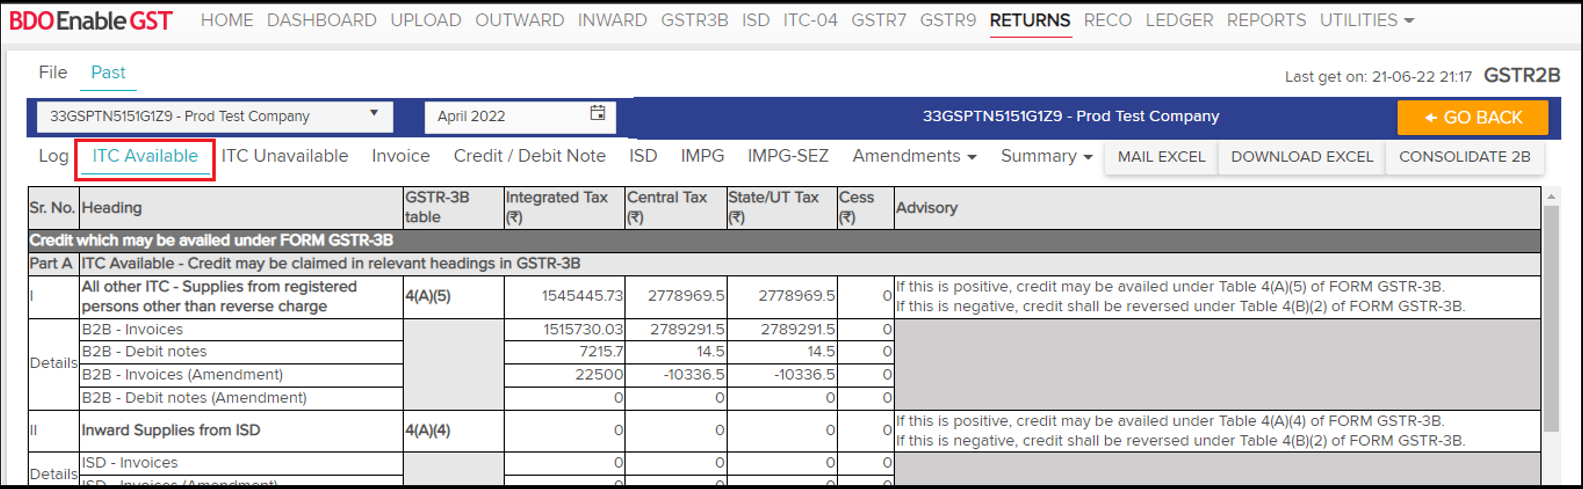
- ITC Available
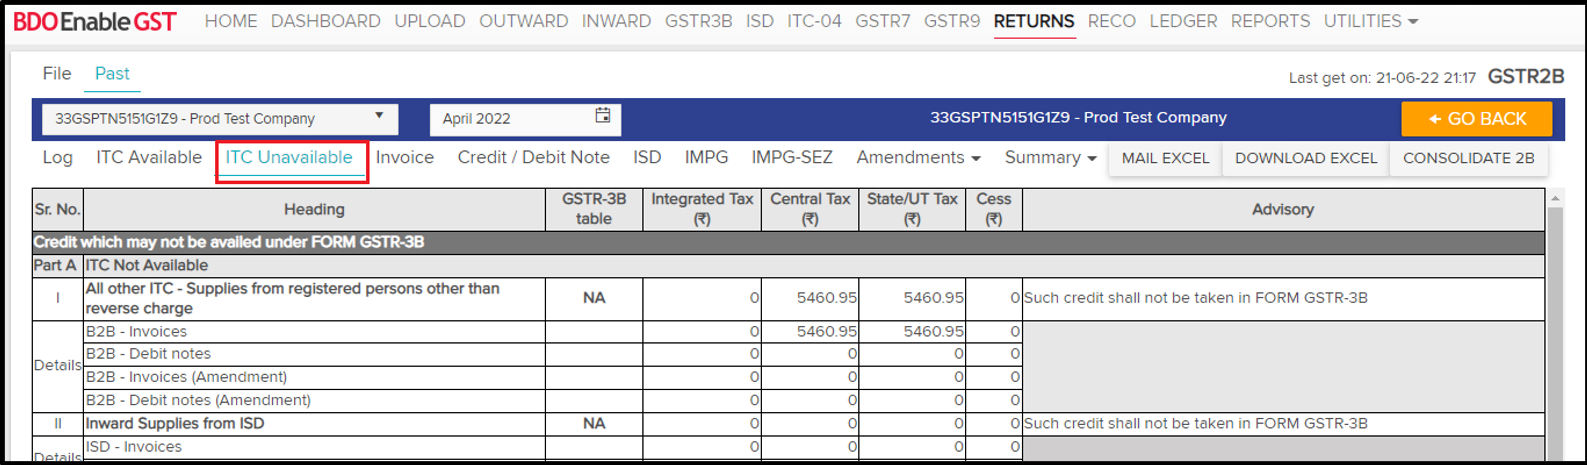
- ITC Unavailable
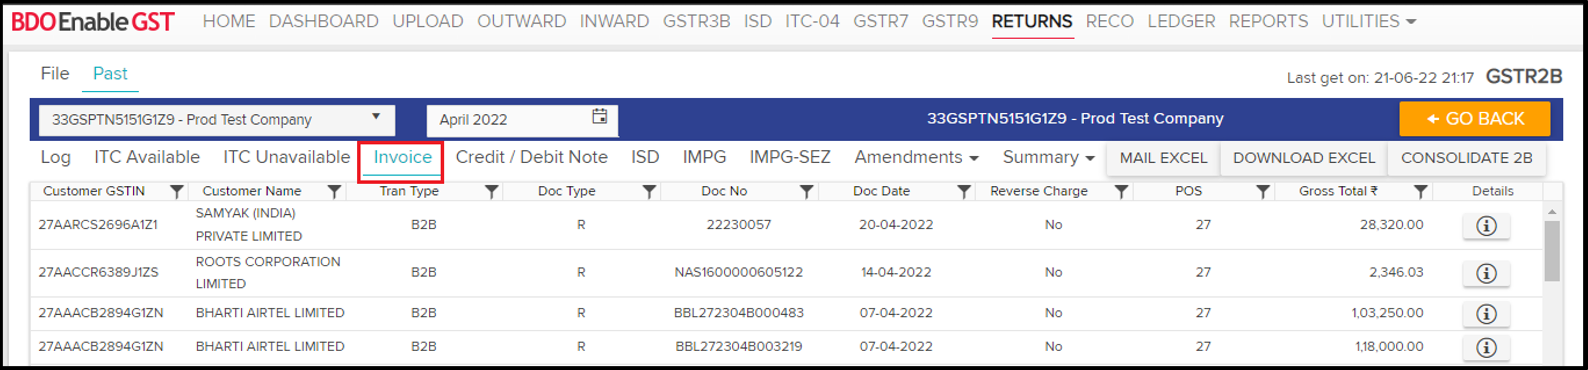
- Invoice
- Credit / Debit Note
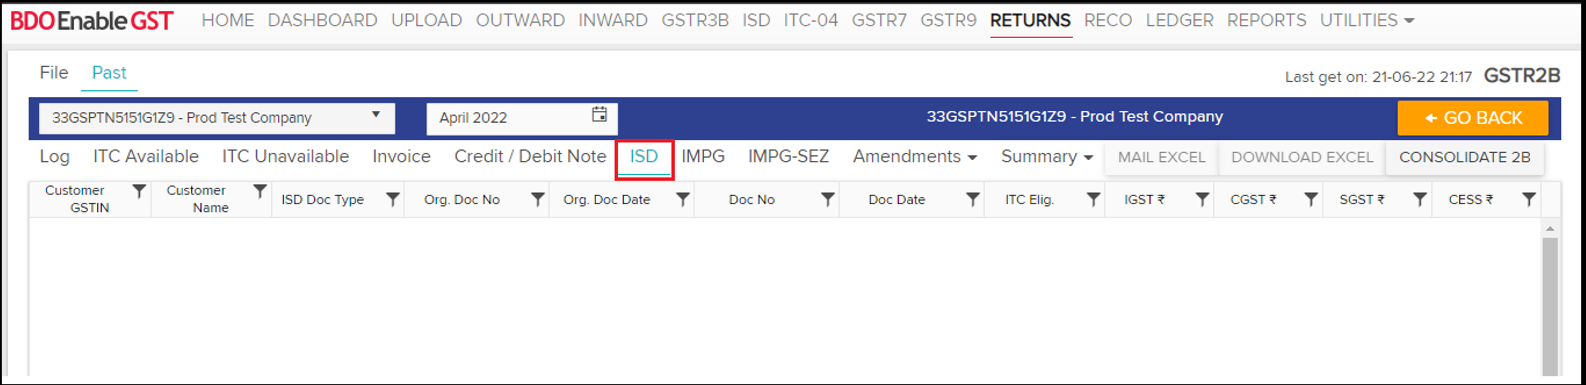
- ISD
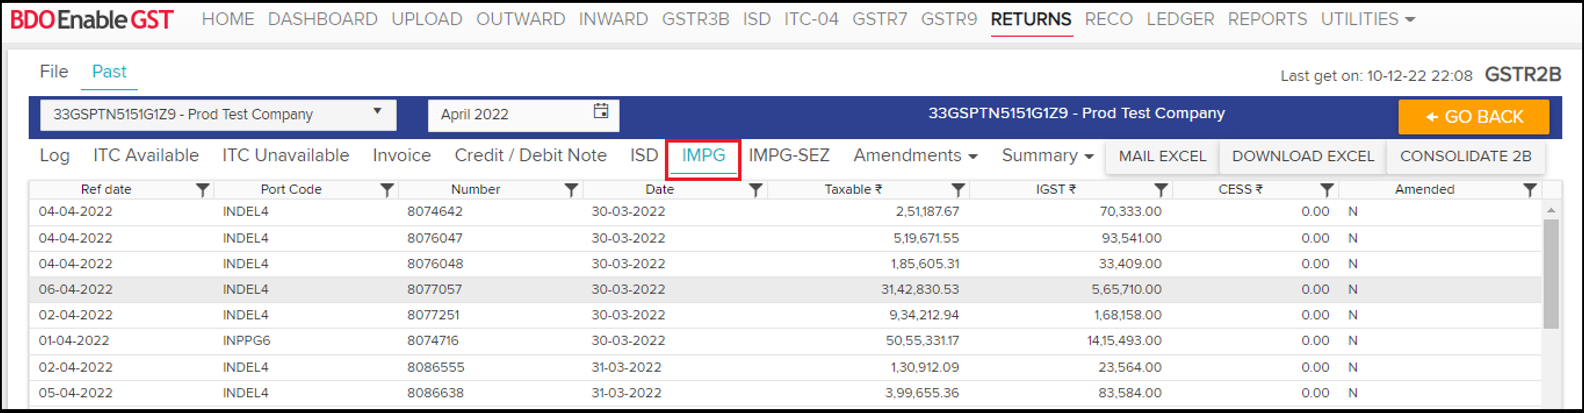
- IMPG
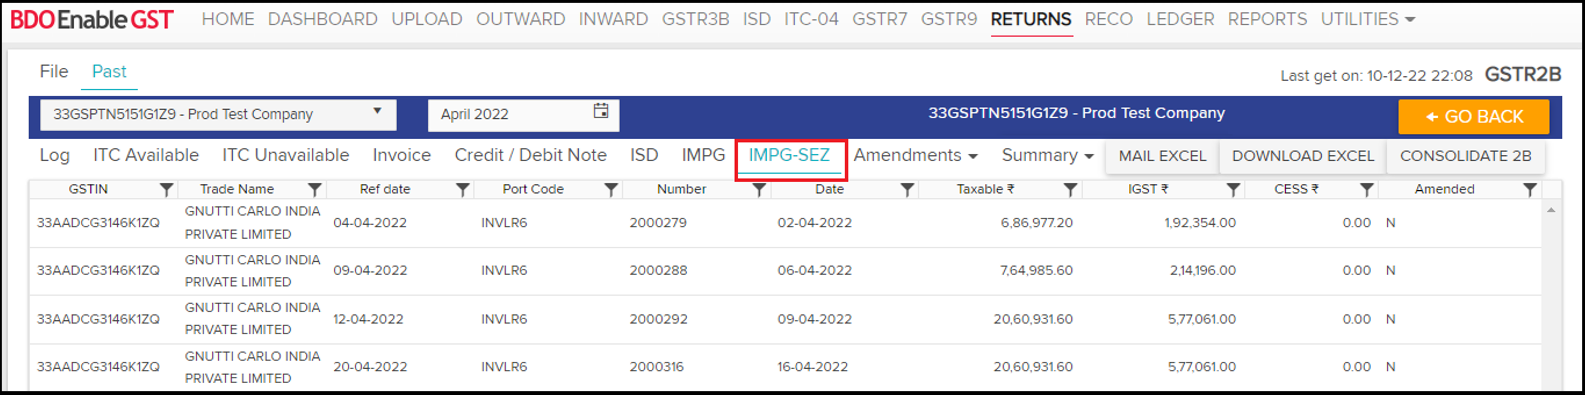
- IMPG-SEZ
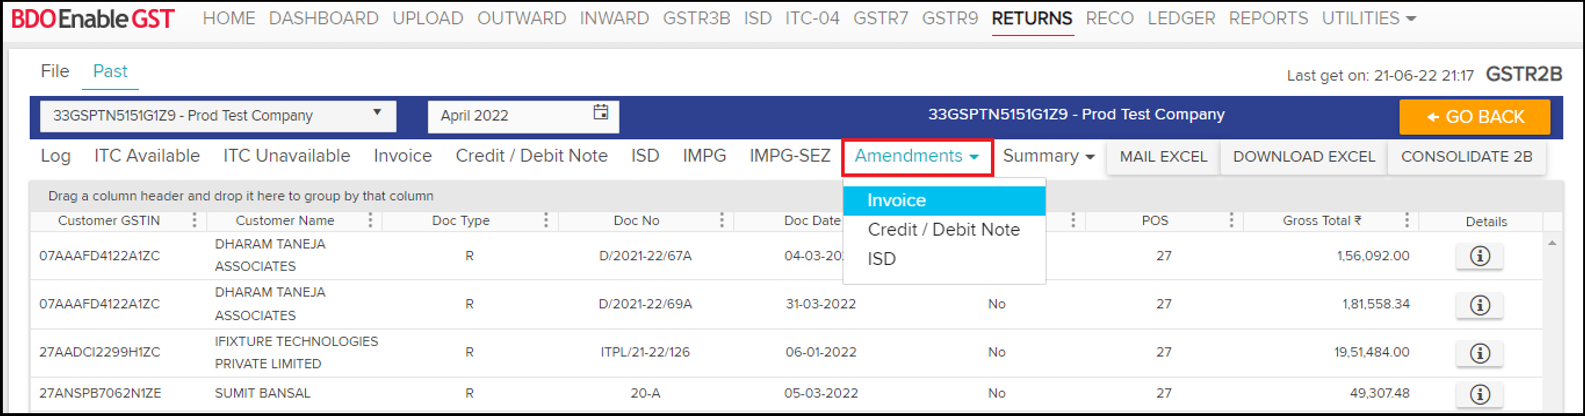
- Amendments (Invoice, Credit Debit Note, ISD)
- Summary
- Logs: “Log” tab will show what activities have been performed i.e. Invoice, Credit / Debit Note, etc. along with the return period & the user who have performed these activities.
- ITC Available: All ITC Available records shall be visible in this section.
- ITC Unavailable: All ITC Unavailable records shall be visible in this section.
- Invoice: All Invoices shall be visible in this section.
- Credit / Debit Note: All Credit/Debit Notes shall be visible in this section.

- ISD: All ISD data shall be visible in this section.
- IMPG: All Import of goods data visible in this section.
- IMPG-SEZ: All Import of goods SEZ data visible in this section.
- Amendments: All amendments made to Invoices, Credit/Debit Notes, ISD which were filed in the previous period shall be visible in this section.
- Summary: All Summary shall be visible in this section.

Please Note: User can download all these records by clicking on “Download Excel” option in the respective sections, if user want to send excel via email so just click on “Mail Excel”.
Also, user can download the consolidate GSTR2B report in the respective sections.
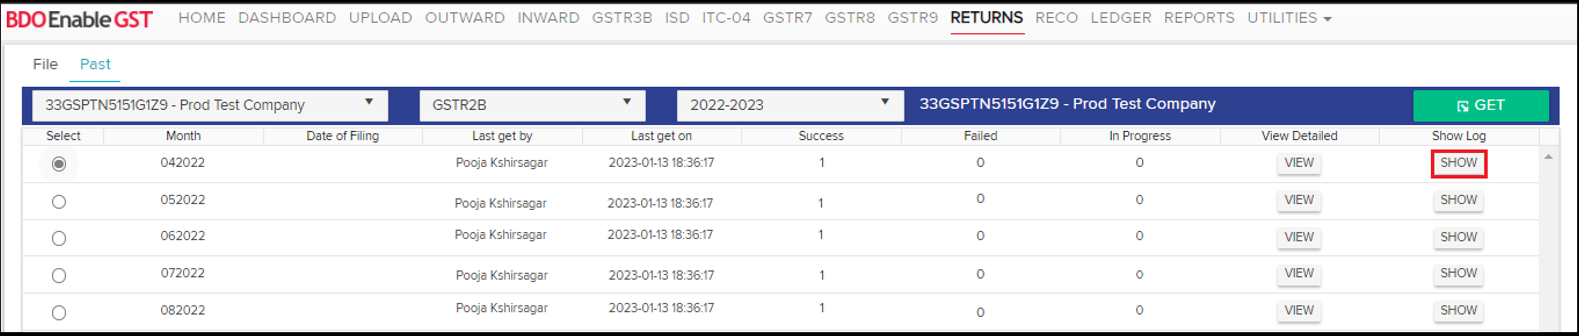
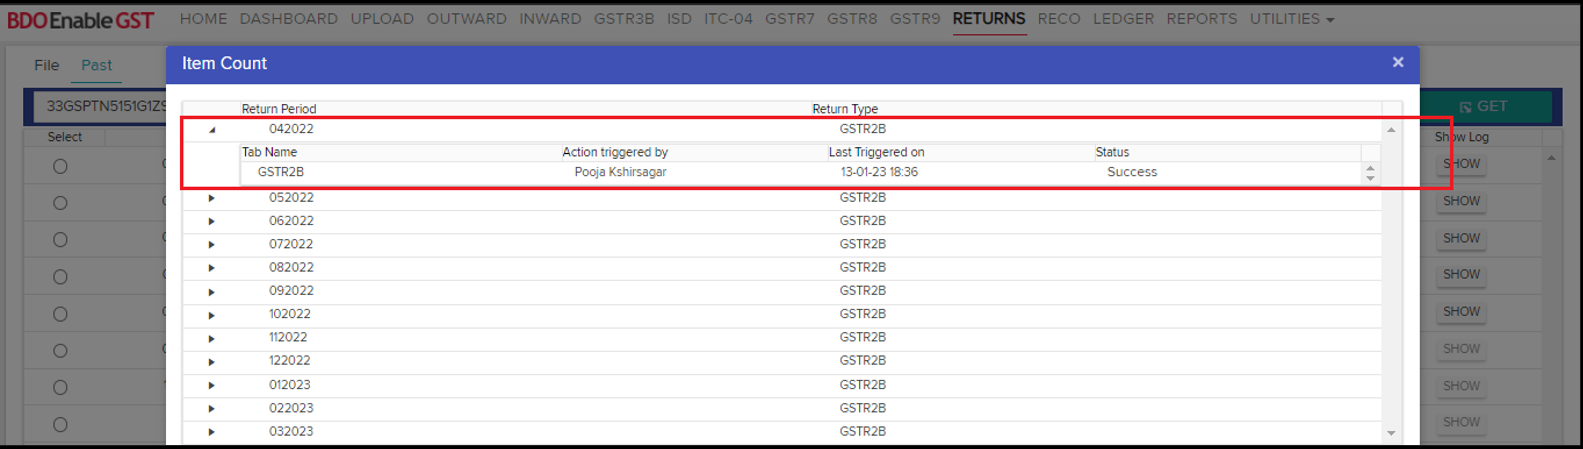
- Show Log: Click on “Show” button to view the logs.
Please Note: As per the latest guidelines by GST department, from October 2024, GSTR-2B data will be available at the invoice level, and reconciliation will now be done on invoice level instead of tax rate-level.
- View Detailed Data: Line level data can be viewed & downloaded in excel format by clicking on “View” button under “View Detailed” section.
- Once GSTR 2B has been downloaded, then go to “Reco” tab to run the reco.

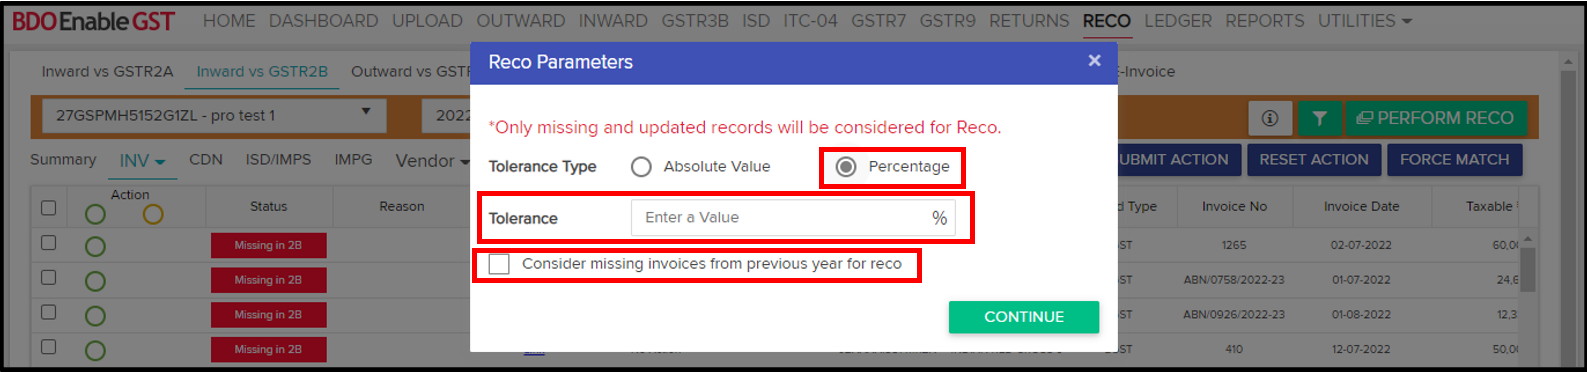
- After clicking on “Reco” Tab, click on “Inward vs GSTR2B”, select the GSTIN & Financial Period. Select the module either Invoice or Credit/Debit Note & click on “Perform Reco” button.

- While performing reconciliation, click on “perform Reco” it shall ask user for Tolerance, Enter the Tolerance range & if required click on the check box to consider the Missing invoices of previous year. Such invoices of previous financial year will be marked a status as ‘Cross FY Match’, ’Cross FY Mismatch’ etc. e.g. Invoices which remained missing in FY 2020-21 can be considered while performing reconciliation for FY 2021-22.
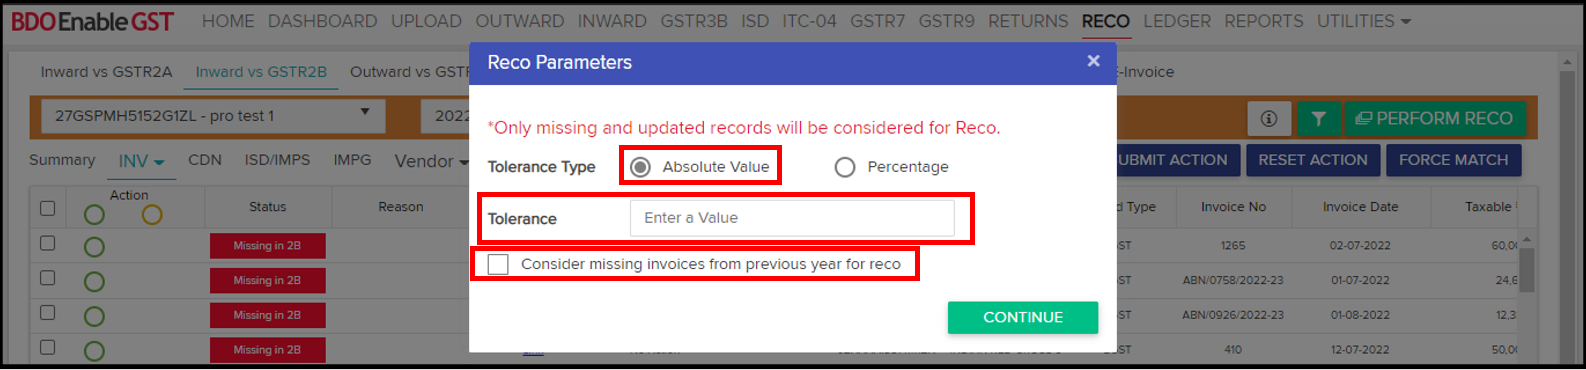
Now user can even enter percentage wise tolerance value and it is resisted with 2 decimal value the range be from 0.00 to 100.00 if user enter any amount less than 0 and more than 100 it will not allow to go ahead.
A pop-up is displayed stating “Reco under process. Please check the grid below for Reco process status.”

- While performing Reco it will show status in Reco History whether it is (Gathering data / In queue / Under Process / Success / Failed)
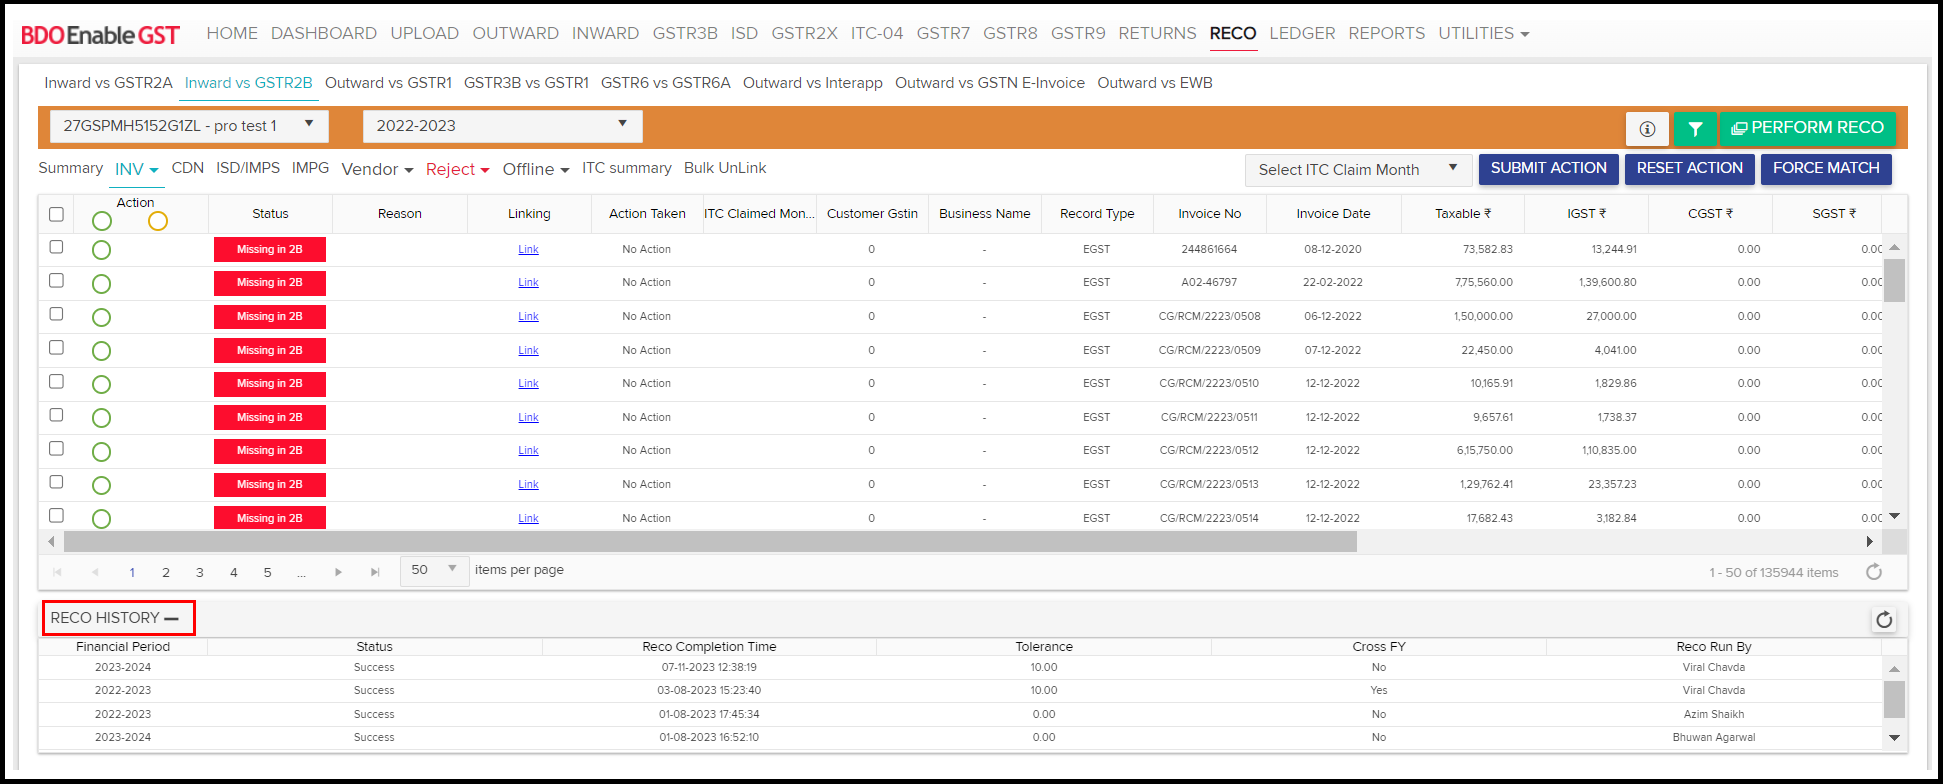
- Once the reconciliation is performed, user will be notified by an email.

- Once the Reco is completed, status of the reco will appear in grid.

Note: User can take ITC based on the action feature. We have given the action function, wherein Green indicates “Accept EGST” and Orange indicates “Accept GSTN”.

- To take action on a particular transaction, click on any of action button then you can select the “ITC claim month” and then click on “Submit action”.
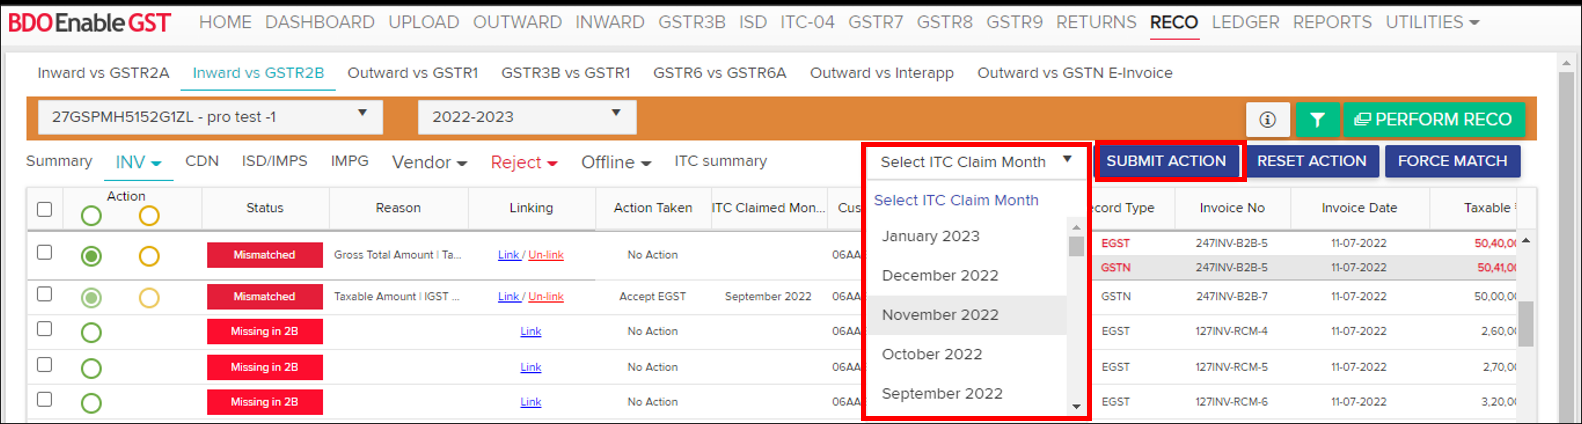
A confirmation pop-up will be displayed to submit the action.

A Success Message shall be displayed for confirmation of Action submitted on the transaction successfully.

- User can check the action taken on the transaction.

- User can also add a remark into the transaction by clicking on the “i” button.

Enter the remarks and the click on “Add Remark”
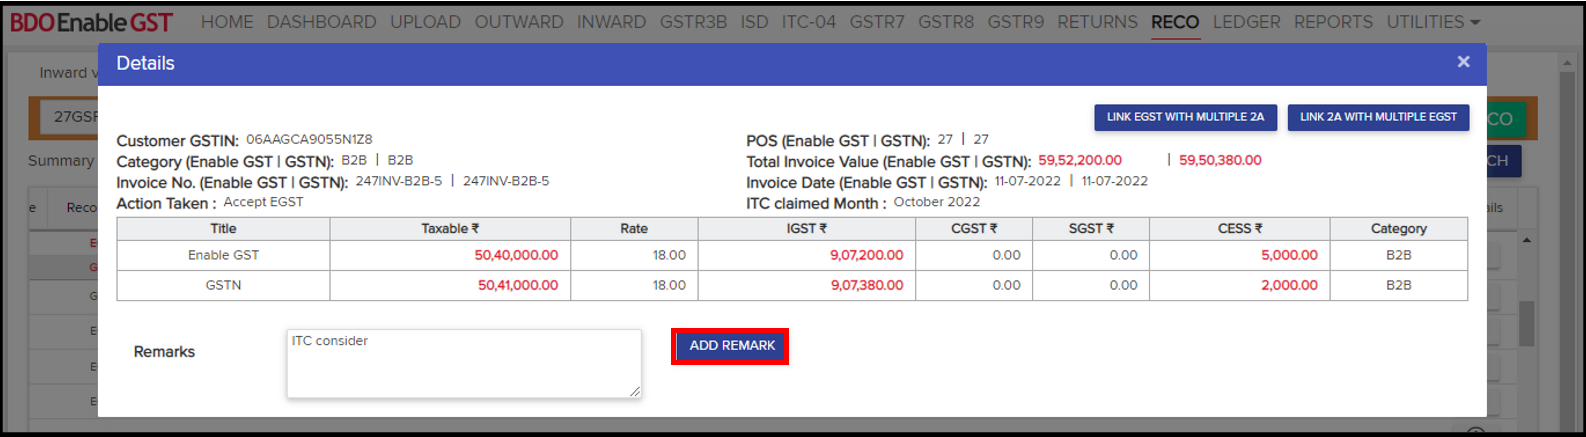
A Success Message shall be displayed for confirmation of remarks added successfully on the transaction.

Remarks can be viewed in the “Remark” column.

- RCM flag “Y” and “N” will indicate whether the transaction is an RCM or not.

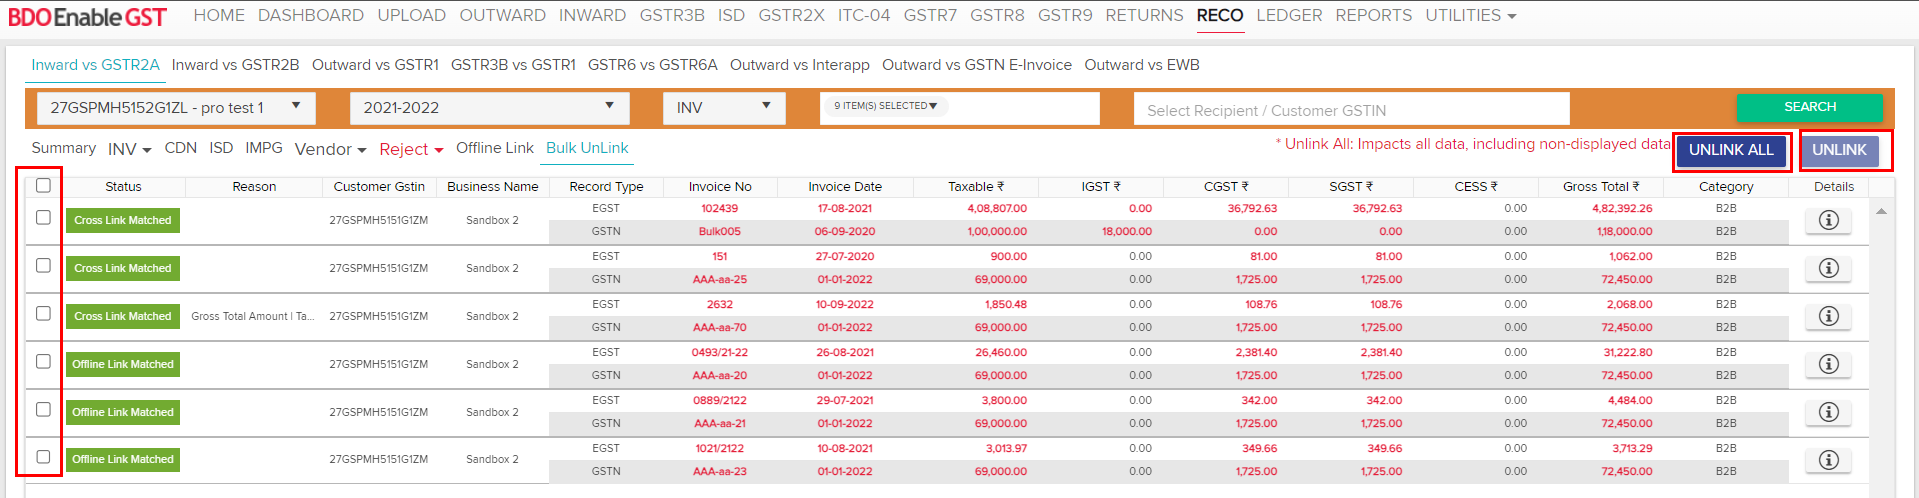
- User can also unlink multiple invoices by using “bulk unlink” functionality. Click on “bulk unlink”.

- Select the category of transactions, statuses and vendor from the drop down and then click on “search” to view the invoices.

- User can unlink all the invoices by clicking on “unlink all” or can select the invoices from and click on “unlink” to unlink the selected invoices.
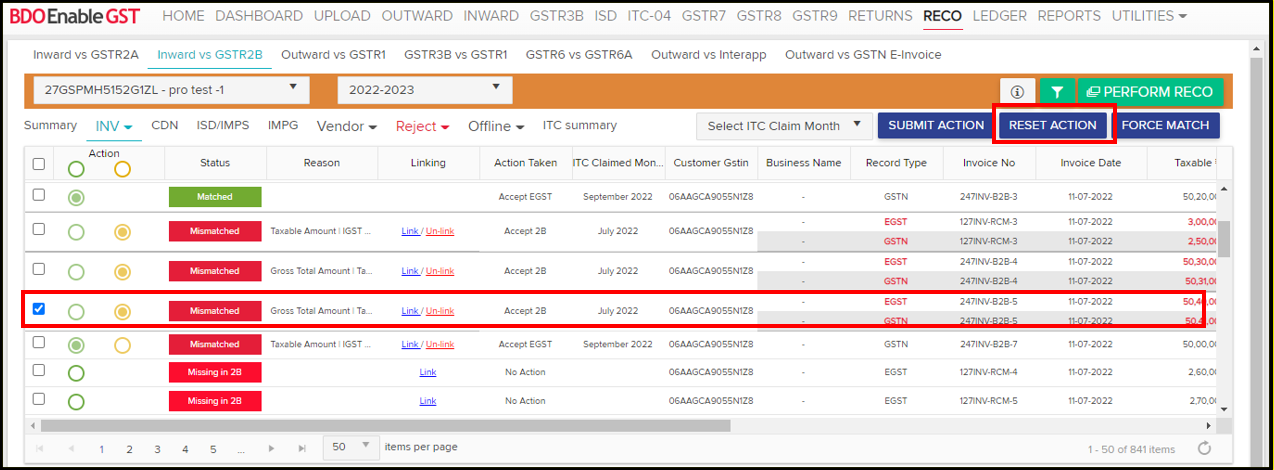
Reset Action:-
- Select the transaction to reset the action taken earlier, then click on Reset Action, a confirmation pop-up will be displayed.
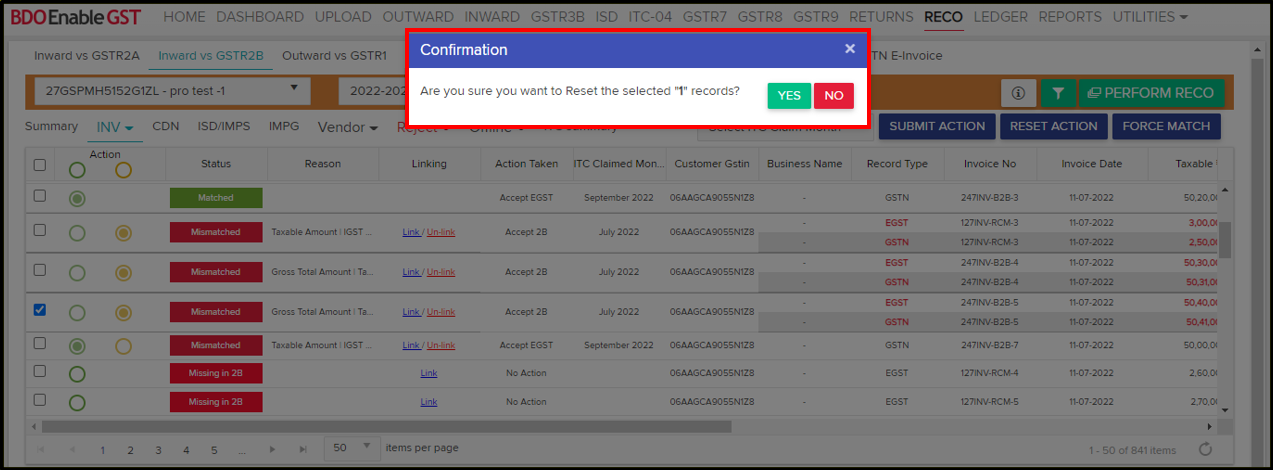
- A Success Message shall be displayed for confirmation of reset action on the transaction.

- Selected records has been reset successfully.

Note : Reset Action is Possible only when GSTR 3B has not been filed.
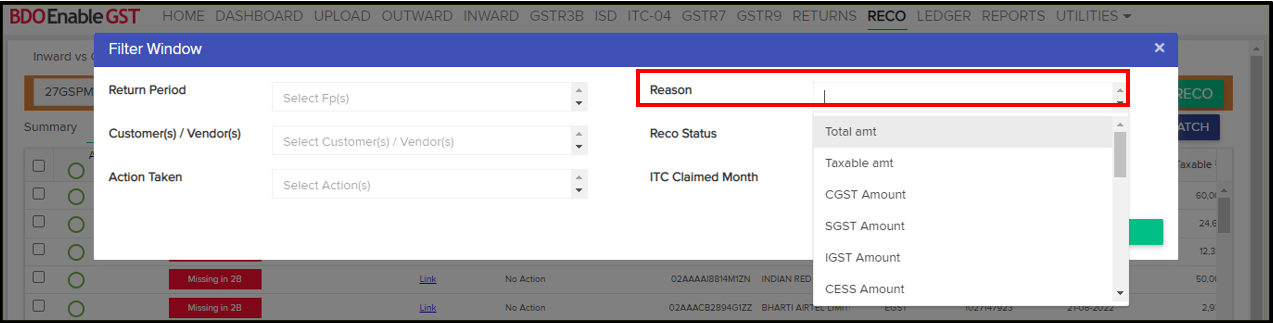
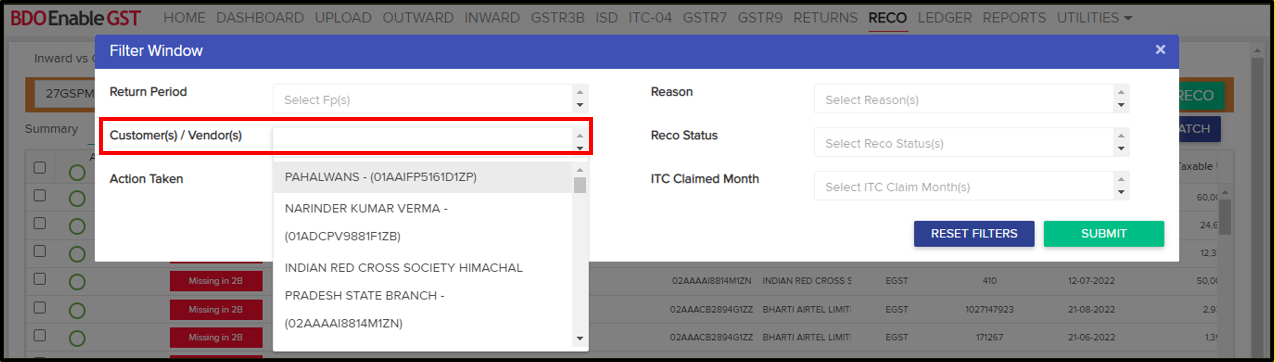
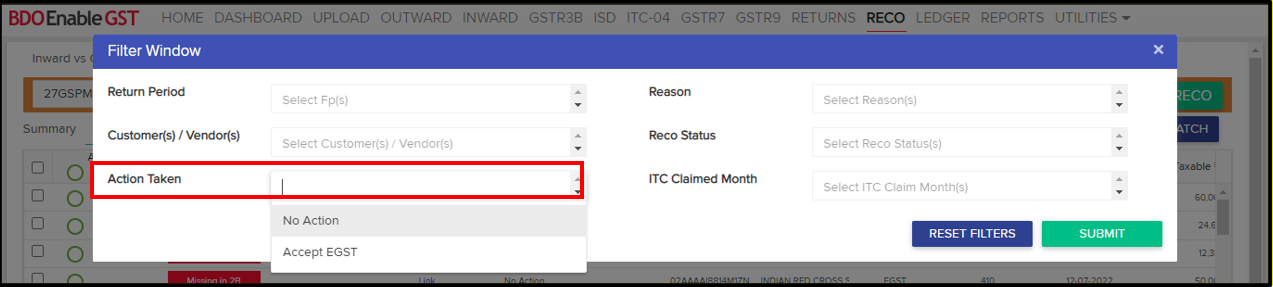
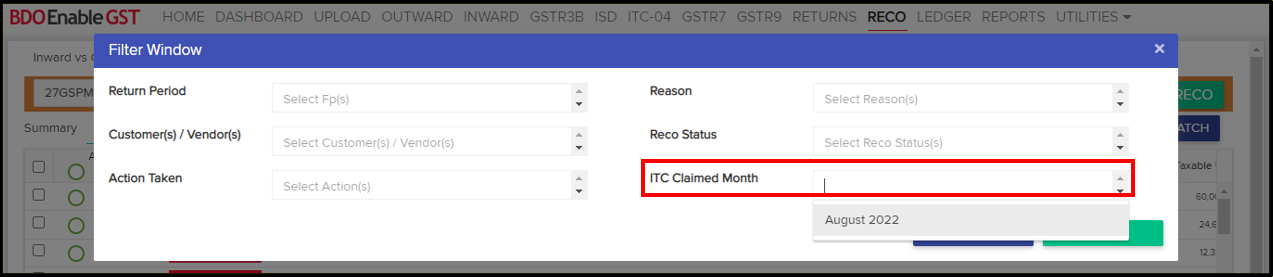
Filters:-
User can filter out the data as per the user convenience by clicking on the Filter option.

- Retun Filter: User can filter out the data based on the return period either by selecting the values from the drop down or by typing the same in the text box.

- Reco Reason Filter: User can filter out the data based on the recon reason either by selecting the values from the drop-down or by typing the same in the text box.
- Customer/Vendor Name Filter: The user can filter out the data based on the customer/vendor name either by selecting the values from the drop-down or by typing the same in the text box.
- Reco Status Filter: User can filter out the data based on the reco status either by selecting the values from the drop down or by typing the same in the text box.

- Action Taken Filter: User can filter out the data based on the action taken status either by selecting the values from the drop down or by typing the same in the text box.
- ITC Claim Month Filter: User can filter out the data based on the ITC claim month either by selecting the values from the drop down or by typing the same in the text box.
- Select the transaction to reset the action taken earlier, then click on Reset Action, a confirmation pop-up will be displayed.
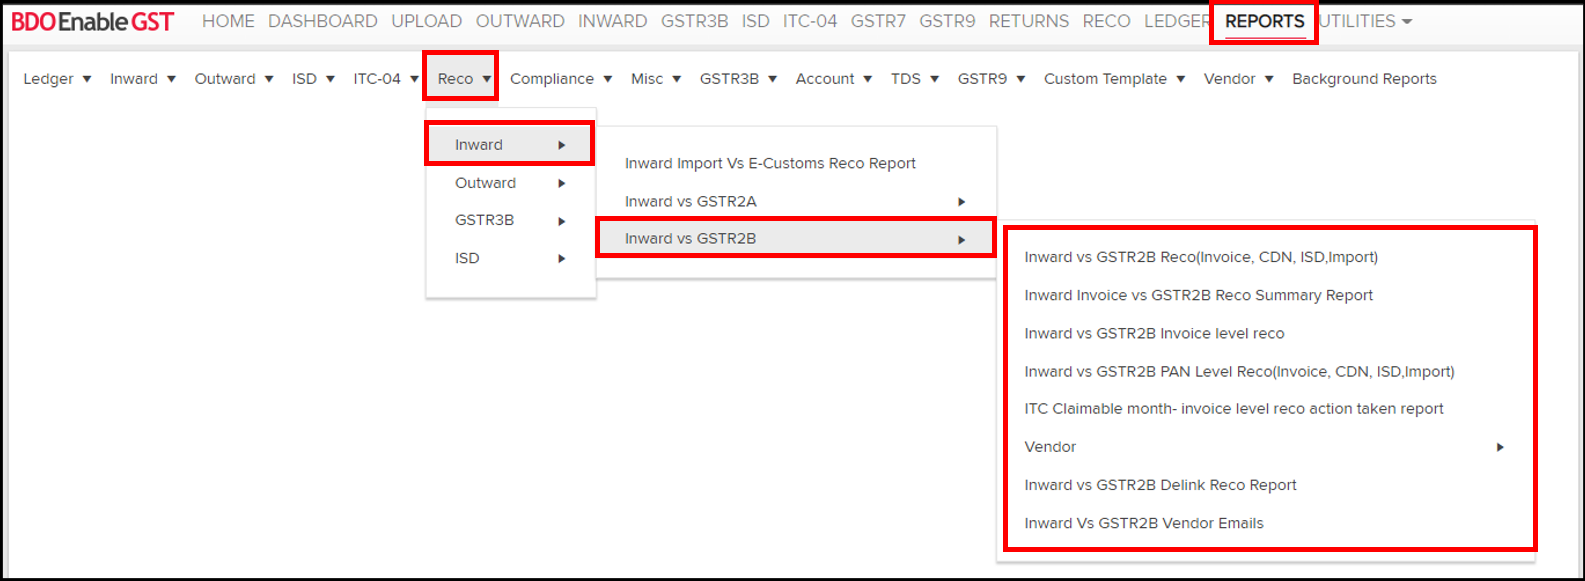
- User can download the performed Reconciliation report by clicking on the reports tab, then select Reco Tab >> Inward >> Inward vs GSTR2B & Select Tab for which user want to download the Reco Report.
Thanks for reading!
Do you need any support or help?
Please write email to us on enablegst@bdo.in or call us on +022-41642211